 Naasongs.fun
In the world of cryptocurrency, it’s essential to have a reliable and secure wallet to store your digital assets. Solflare is a web-based wallet designed specifically for the Solana network, making it an excellent option for Solana users. With Solflare, you can send and receive SOL-based tokens, participate in decentralized finance (DeFi) platforms, and access other Solana-based services. In this blog post, we’ll guide you through the process of setting up and using Solflare wallet in detail.
Step 1: Create a Solflare account
To get started, head to the official Solflare website and click on the “Create an account” button. You’ll be asked to sign up using your email address or through a Google account. Once you’ve signed up, you’ll receive a confirmation email to verify your account. Click on the link in the email to confirm your email address.
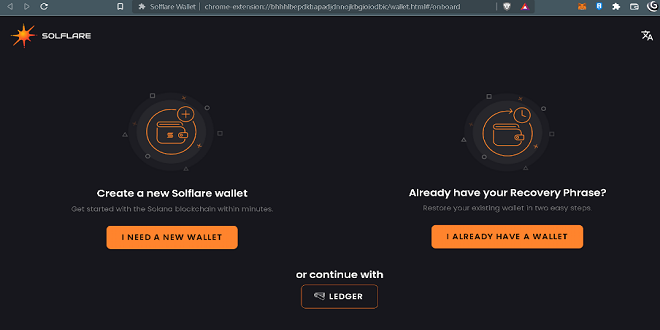
Step 2: Set up your Solflare wallet
After confirming your email, you’ll be taken to the Solflare dashboard. From there, click on the “Wallet” tab to set up your Solflare wallet. You’ll be prompted to create a new wallet by entering a new password. Create a strong password that is difficult to guess and which you will remember.
Step 3: Fund your Solflare wallet
Once your wallet is set up, it’s time to fund it with SOL tokens. You can purchase SOL tokens from various exchanges, such as Binance, BitMax, or FTX. When you’ve acquired SOL tokens, send them to your Solflare wallet address. To do this, click on the “Receive” tab in your Solflare wallet and copy your wallet address. Paste this address in the destination field when sending SOL tokens from another wallet or exchange.
Step 4: Send or receive SOL-based tokens
Now that your Solflare wallet is funded, you can start sending and receiving SOL-based tokens. To receive tokens, share your wallet address with the sender. To send tokens, click on the “Send” tab in your Solflare wallet and enter the recipient’s wallet address, the amount you wish to send, and submit the transaction. You’ll be prompted to verify the transaction details before initiating the transfer.
Step 5: Explore Solflare’s features
Solflare comes with several useful features for Solana users. You can connect your wallet to decentralized applications (dApps) built on the Solana network. Some popular dApps include Serum, Raydium, and SolFarm. You can also participate in DeFi protocols, such as Uniswap-style AMMs (automated market makers) and lending platforms. Finally, Solflare enables staking, which allows you to earn rewards by locking up your tokens in exchange for validating transactions on the Solana network.
Conclusion:
Solflare wallet is an excellent option for anyone who uses the Solana network. It’s easy to set up and use, making it perfect for beginners and advanced users alike. We’ve outlined the steps to create a Solflare account, set up your Solflare wallet, fund it with SOL tokens, send and receive SOL-based tokens, and explore Solflare’s features. With these steps, you can confidently start using Solflare as your go-to Solana wallet.