 Naasongs.fun
Did you know that approximately 72 million Americans plan to take their RV on a trip within the next year? Most people want to take their family RV-ing to explore nature and travel more in a flexible way.
If you’re planning on going RV-ing, it’s essential to know how to keep your RV in the best shape possible. This will lessen your chances of experiencing significant problems during your travels. Although learning about RV repair can initially seem overwhelming, the trick is taking it one step at a time.
Keep reading this guide to learn everything you need to know about RV repair and maintenance!
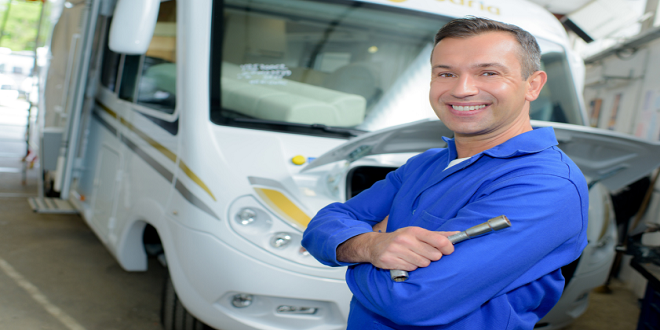
Prepare for RV Repairs
The cost of repairing your RV varies, depending on different factors, like your location and how serious the problem is. Before you go on your road trip or embark on van life, you’ll need to do your research.
Research Repair Shops
Check with your local RV repair shops for more information about simple service needs like oil changes, tire rotation, or a general tune-up. You should also ask these repair shops about a regular prevention schedule for maintenance.
It’s also a good idea to shop around to find a reliable mechanic both in your area and in the locations you’re traveling to. Take the time to research Google and check out business Facebook pages to see how their customers feel about the services they receive.
Doing this will help ensure you have reputable repair shops you can reach out to in case you experience an emergency on the road.
Put Aside Emergency Repair Cash
Putting aside extra cash for emergencies isn’t always easy, but it’s an excellent goal to keep in mind. Remember, if something goes wrong with one of an RVs major systems, like electrical or plumbing, you could be facing thousands of dollars in repair work.
You may not want to wait to take the RV trip of your dreams, but saving as much money as you can during the year is essential.
Learn to Do Repairs on Your Own
One smart way to save money on RV repairs is to learn to do the basics on your own. You can start by finding manuals and books to help you with everything from maintenance to major repairs.
Look for RV handbooks and beginner’s guides to troubleshooting and repairing. You can also find numerous RV websites and YouTube videos that will walk you through the steps of basic repairs.
Buy Helpful Accessories
You’ll also need to purchase basic RV gadgets to keep your RV in the best shape possible. For example, a water pressure regulator with a gauge is the best way to combat plumbing problems. This is because some RV parks may not have their water outputs regulated, and you don’t want to risk getting a pressure issue with your plumbing.
You can also consider buying a power line monitor. Power line monitors allow you to check the voltage of a power hookup and help you avoid frying your electrical panel.
Surge protectors in your RV can also help protect your electrical items from storms or other electrical issues.
Wheel stabilizers and energy-saving kitchen gadgets can also help, so be sure to research to have the best supplies on hand during your trip.
Have Extra Parts on Hand
In addition, you should also have replacement parts on hand. The light bulbs in your RV will often burn out during your trip. Be sure to check your light fixtures and bulb wattages before you go.
You’ll need to keep backup bulbs in stock so you can replace your lights quickly when you’re on the road.
RV windows can also take a beating during your trip, usually due to stones flying up while you’re driving. The good news is it’s relatively simple to replace or reseal your RV windows.
First, you’ll need to measure the area of your windows so you can order replacement windows to take with you. To do this, you’ll need to remove any blinds, shades, or window valances and measure from inside of the RV.
Next, remove screws from the outside of your window to get an accurate measurement. Have someone else hold the window in place while you take your measurements.
If you have an odd-shaped window, check with your RV manufacturer to get the exact measurements you need. You’ll also need to measure the depth of the window by inserting the ruler towards the wall until it touches the outer portion of the window frame.
You’ll also need to ensure you take a caulk gun and RV sealant on your trip.
Have a Maintenance Checklist Ready
It’s best to write out a maintenance checklist to refer to before you travel in your RV. Before each trip, you’ll need to:
- Clear off roof debris
- Check the battery
- Retract awnings and slides before traveling
- Check brake lights and headlights
- Check the tires and wheels
- Check the seals
- Check the engine for loose hoses and leaks
- Vacuum AC and heat vents
RV Maintenance and Repair Tips
Your first step to taking care of your RV and avoiding costly repairs is learning to keep your RV well-maintained throughout the year.
These maintenance steps include:
Engine Maintenance
Remember, your RV is large and heavy, and you’ll drive it for many miles during your travels. Doing this puts a lot of strain on your RV.
Also, when you’re not using your RV during the winter, it sits idle, affecting how well it performs.
Check the Battery
You’ll need to start by checking the battery. Your RV’s battery needs to be fully charged all the time. Be sure to do battery checks before every trip and at the beginning of the summer. You can expect your RV battery to last between 3 and 5 years.
Check and Change the Oil
It’s important to remember since you don’t use your RV every day, you won’t have to change your oil as often as you do for your regular car.
Therefore you should change the oil in your RV every 4,000 miles or at least once a year. If you don’t change the oil regularly, you’ll cause excess engine wear and tear, leading to more expensive repairs.
Be sure to refer to your owner’s manual to identify your RV components correctly.
Change the Filters
Your RV’s engine needs clean filters to run smoothly. When you change the oil, be sure to inspect the coolant, fuel, hydraulic, and air filters. Doing this will prevent excess wear on the engine and prevent it from overheating.
Roof Maintenance and Repairs
Roof leaks are a common RV problem that people encounter. Keep in mind that many RVs have air conditioners mounted on the roof as well as vents and telecommunications equipment.
Even the newest RVs will eventually give away to weather elements and spring a leak. This is because all sealants will crack and harden due to the age and motion of the vehicle.
Store Your RV Indoors or Buy a Cover
The first step to preventing roof problems is to store your RV under a UV-resistant and waterproof cover. If possible, it’s best to use an indoor RV storage facility or somewhere that has a roof. This way, your RV is protected from the elements when it’s not in use.
If this isn’t possible, you’ll need to purchase a quality RV cover to protect your RV when it’s parked outside. Be sure to find a cover that’s UV-resistant and waterproof.
Buying an RV cover can be tricky if it’s your first time. You’ll need to start by measuring our RV. Measure the width by the widest part of your RV, usually by the side mirrors. Then measure the length from bumper to bumper.
Quality RV covers can cost hundreds of dollars, but this is ultimately less expensive than having to pay for repairs due to water damage.
Clean Your Roof Frequently
Frequent roof cleaning is the best way to protect your roof and keep it in good shape. If you’re traveling to your RV full-time, you’ll need to schedule weekly cleanings.
Otherwise, you should clean your roof after every RV road trip to eliminate the accumulated moisture, dirt, and grime.
Check for Leaks
Small leaks can cause severe damage to your RV before it even gets inside. This is because the water will initially soak through your RV’s outer framework before reaching the materials in the ceiling.
Be sure to inspect your A/C unit, skylights, vents, and the edges of your roof before and after every trip.
Repairing Your Roof
To repair your roof, you’ll need to fill in any cracks with RV roof sealant. You should also apply a new coat of sealant once a year to prevent any new leaks from occurring.
Inspect Slide-Outs and Seals
If you have a slide-out, you’ll need to ensure you inspect it before your trip. When dirt, grime, and debris build up in your slide-out rails, it can cause corrosion and rust.
To avoid problems, you’ll need to lubricate and clean the side-out rails at least twice a year. You should also clean them if you notice any squeaks or strange sounds when they’re in use.
Doors, windows, and roofs have seals that can degrade over time, allowing moisture to enter your RV. You’ll need to inspect these seals at least every six months to keep them in good condition.
Lubricate seals to keep them pliable and inspect them for cracks, water stains, and general deterioration. If you notice seals that are worn out and can’t be repaired, get them replaced as soon as possible.
Check the Brakes, Tires, and Wheels
Remember, tires and wheels keep you safe while on the road. You’ll need to take steps to ensure they’re in the best shape possible before you hit the road.
The UV rays from the sun can cause your tires to degrade over time. Be sure to clean the tires regularly and use a UV protectant to keep them lasting longer. When your RV is parked for the winter, consider using RV tire covers to protect them.
Next, check the tire pressure. Having underinflated or overinflated tires can lead to a devastating accident. Most of the time, the pressure in RV tires should be between 40 to 80 PSI, but this can depend on how much weight your RV is carrying.
The best way to determine the correct tire pressure is to look for the max tire pressure on the sidewall.
While checking the tire pressure, tighten the wheel lug nuts and ensure your wheels are secure.
You also need to check the brakes before every trip. Check to ensure they’re working correctly and normally engage when you need to stop. You’ll also need to lubricate all the wheel bearings and check if you need a break replacement before you leave.
Winterize Your RV
Winterizing your RV properly will help you avoid costly repairs during the summer months. You’ll need to ensure to take specific steps, such as:
- Clean the exterior
- Clean the interior
- Empty cupboards
- Empty the freezer and fridge
- Drain the water from the toilets and tanks
- Check all the seals
- Unplug all appliances
- Inspect the RV for damage or holes
- Ensure all doors and windows are closed and locked
- Apply a cover if you’re storing your RV outdoors
Perform Upgrades
If you don’t have the money to buy an RV brand new, you can look to perform various upgrades that will make your trip much more manageable.
Additional fenders will give more protection, and skid plates will help with unexpected hazards on the road. Ladders and extra lighting are perfect for safety reasons, and adding solar panels will save you money and reduce your carbon footprint.
You can take a look at these van conversions for more ideas.
Keep This RV Repair Guide With You
Now that you have this RV repair guide, you’ll be able to keep your RV in the best shape possible during your trip.
Remember, your RV is an investment, and learning to keep up with maintenance and repairs will keep your RV going for years to come.
To learn more automobile, health, and education tips, be sure to check out the rest of our blog today!