 Naasongs.fun
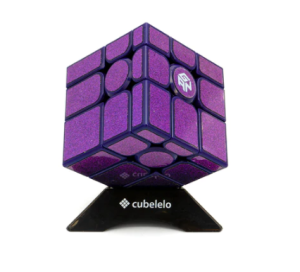
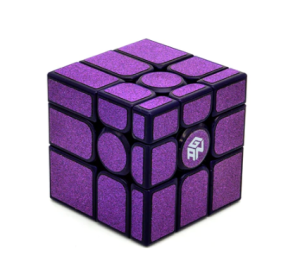
The mirror cube, also known as the mirror block, is a variation of the classic Rubik’s Cube. Unlike the traditional cube, the mirror cube has irregularly shaped pieces that create unique patterns when solved. Here, we will discuss some of the most challenging mirror cube patterns and how to solve them.
Understanding Mirror Cube Notation
Before diving into the most challenging mirror cube patterns, it’s important to understand the notation used in solving the cube. The notation is the same as the standard Rubik’s Cube, with each face of the cube being represented by a letter. The letters are:
F (front)
B (back)
U (up)
D (down)
L (left)
R (right)
The apostrophe (‘) denotes a counterclockwise turn, and the number 2 denotes a double turn.
Now that we have a basic understanding of the notation used in solving the mirror cube, let’s explore some of the most challenging mirror cube patterns and how to solve them.
The Checkerboard Pattern
The checkerboard pattern is one of the most challenging patterns to solve on the mirror cube. The goal is to create a black-and-white checkerboard pattern on two opposite faces of the cube. To solve this pattern, follow these steps:
- Choose two opposite faces of the cube and make sure that the centerpieces of those faces are black and white.
- Rotate the cube until the black center piece is facing you, and then perform the algorithm: R U R’ U R U2 R’
- Rotate the cube 180 degrees, so the white centerpiece is now facing you, and perform the same algorithm: R U R’ U R U2 R’
- Rotate the cube 90 degrees and perform the algorithm: F R U R’ U’ F’
- Repeat step 4 until the checkerboard pattern is complete.
The Star Pattern
The star pattern is another challenging pattern to solve on the mirror cube. The goal is to create a star shape on one face of the cube. To solve this pattern, follow these steps:
- Choose a face of the cube and make sure that the centerpiece of that face is a different color than the rest of the face.
- Rotate the cube until the centerpiece is facing you, and then perform the algorithm: F R U R’ U’ F’
- Rotate the cube 120 degrees counterclockwise and repeat step 2.
- Rotate the cube 120 degrees counterclockwise again and repeat step 2.
- Rotate the entire cube 180 degrees and repeat steps 2-4 on the opposite face.
The Swirl Pattern
The swirl pattern is a challenging pattern that creates a swirling effect on one face of the cube. To solve this pattern, follow these steps:
- Choose a face of the cube and make sure that the centerpiece of that face is a different color than the rest of the face.
- Rotate the cube until the centerpiece is facing you, and then perform the algorithm: R U R’ U R U2 R’
- Rotate the cube 180 degrees and repeat step 2 on the opposite face.
- Rotate the cube 90 degrees counterclockwise and perform the algorithm: R U R’ U R U2 R’
- Rotate the cube 180 degrees and repeat step 4 on the opposite face.
Solving the Mirror Cube with the GAN 11 M Pro
The GAN 11 M Pro is a popular choice among speedcubers for solving the mirror cube. It has a smooth and customizable feel that allows for quick and accurate turns. Additionally, its magnetic mechanism helps to improve accuracy and solve times.
Before attempting to solve mirror cube patterns, it’s important to understand the basics of solving a regular 3×3 Rubik’s Cube. The process of solving a mirror cube is similar to solving a regular cube, but with some key differences.
Step 1: Solving the First Layer
The first step is to solve the first layer of the cube, but with the added challenge of having to match the colors of adjacent pieces on each side. This requires careful observation of the mirror cube’s patterns and determining which colors need to be matched.
Step 2: Solving the Second Layer
Once the first layer is complete, the next step is to solve the second layer. This involves matching the colors of the pieces on the middle layer with the corresponding colors on the first layer.
Step 3: Orienting the Last Layer
The cube’s last layer is oriented in the third stage. In order to accomplish this, the cube must be turned while bearing in mind the special patterns of the mirror cube.
Step 4: Permuting the Last Layer
The final step is to permute the last layer or rearrange the pieces until all colors are matched on each side of the cube. This can be the most challenging step of solving a mirror cube, as the patterns can make it difficult to determine the correct moves to make.
Once you have a basic understanding of the process, it’s time to tackle some of the most challenging mirror cube patterns.
Conclusion
Solving a mirror cube can be a fun and challenging experience that can improve your cognitive skills. With the right tools and knowledge, like the gan 11 m pro and the basic steps of solving a 3×3 Rubik’s Cube, you can take on even the most challenging mirror cube patterns. Just remember to stay patient, focused, and determined, and the satisfaction of solving a difficult mirror cube pattern will be well worth the effort.